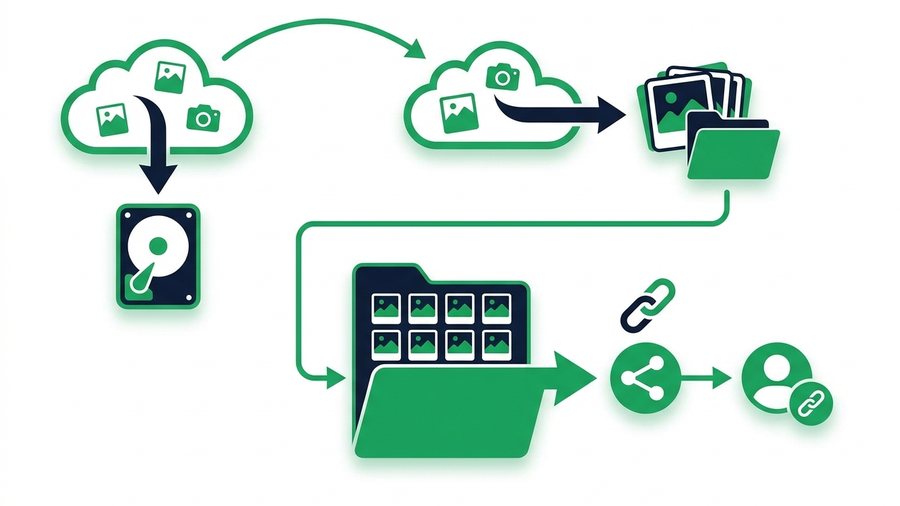
Years of birthdays, trips, and everyday snapshots quietly pile up inside your Facebook account. Most people never think about them until something goes wrong, a locked account, a lost password, or a decision to leave the platform, and by then the photos feel trapped. They are not. Facebook gives you two official tools to pull every photo and album back out, and both are free.
The catch is that the defaults are set for speed, not quality. If you click through without checking the options, you can end up with heavily compressed thumbnails instead of the full-resolution images you actually want. A few careful choices turn a throwaway export into a proper archive.
This guide walks through Download Your Information for a complete personal backup, the Transfer a Copy tool for moving photos straight to another service, and how to pick high quality, organize what lands on your computer, and re-share whole albums with people through a single link.
Key takeaways
- Facebook gives you two free export tools: Download Your Information (a ZIP you keep) and Transfer a Copy (sends photos straight to Google Photos or Dropbox).
- Set media quality to High before you request the export, or your backup is permanently compressed, and there is no way to upgrade it after the fact.
- Deselect every data type except Photos and Videos to keep the file small and cut the wait from hours to minutes.
- Re-share a whole album at full quality with ShareIt.onl: up to 100 files or 3 GB, no sign-up, with an expiring link and a QR code.
Two Official Ways to Get Your Photos Out
Facebook offers two separate tools, and they solve different problems. Knowing which to reach for saves you a lot of waiting.
| Tool | Best for | Where it sends photos | Quality option |
|---|---|---|---|
| Download Your Information | A full personal backup on your own computer | A downloadable ZIP file | Choose High |
| Transfer a Copy | Moving photos straight into another cloud service | Google Photos, Dropbox, and similar | Full quality transfer |
When to use each
Reach for Download Your Information when you want everything in your own hands, a ZIP you control, store, and hand off however you like. Reach for Transfer a Copy when your goal is simply to get your photos living in another service without your computer as a middleman. Many people do both: one archive for safekeeping, one live copy in the cloud.
Download Your Information, Step by Step
This is the deep-backup route. It packages your chosen data into a file you download and keep forever.
- Open Facebook Settings, then find Your Facebook Information or Download Your Information.
- Choose to create a new export or file.
- Under data types, deselect everything except Photos and Videos if photos are all you want. This keeps the file small and the wait short.
- Set the date range to All time for a complete history, or narrow it to specific years.
- Set format to HTML if you want to browse it like a mini website, or JSON if you plan to process it with software.
- Crucially, set media quality to High. The default may be lower, which permanently shrinks your images.
- Request the file, then wait. Facebook emails or notifies you when it is ready, sometimes minutes, sometimes hours or a day depending on how much you have.
- Download the ZIP within the availability window, since the link expires.
The one setting that matters most
Media quality: High. This single dropdown decides whether your backup contains rich, printable images or soft, compressed ones. There is no way to upgrade quality after the fact, so if you get it wrong, you have to request the whole export again. Double-check it before you submit.
Warning: The download link for your export expires after a limited window. If you request the file and forget about it for too long, the link goes dead and you have to start the whole export over. Grab the ZIP the same day you get the notice.
Transfer a Copy Straight to Another Service
If your real goal is to keep photos safe in the cloud rather than on a hard drive, Transfer a Copy moves them directly, no download step, no ZIP to manage.
- In Your Facebook Information, open Transfer a Copy of Your Information.
- Choose a destination service from the supported list, such as Google Photos or Dropbox.
- Select Photos (and videos, if you want them).
- Sign in to the destination and authorize the transfer.
- Confirm, and let it run in the background; you will be notified when it completes.
Why people like this route
- No large file sits on your computer taking up space.
- Your photos land somewhere with its own backup and search built in.
- It is easy to repeat later to catch newly added photos.
The trade-off is that you depend on the destination service's own rules and storage limits. For a true you-own-it archive, pair a transfer with a full download so you are never locked into a single provider.
Choosing Quality and Organizing the Export
A backup you cannot navigate is barely a backup. Once your files land, spend a few minutes making them usable.
Quality first
Always pick High quality in Download Your Information, and remember that Facebook already compressed these photos when you first uploaded them years ago. The export gives you the best copy Facebook holds, not necessarily the original from your old phone. If you still have those originals anywhere, they will always beat the download. The Facebook video quality guide explains why every upload loses a little detail.
Then organize
That short routine turns a pile of oddly named folders into an archive you will actually open again. For pulling individual clips rather than a bulk export, see downloading your Facebook videos and photos.
Re-Sharing Your Albums by Link
Once your photos are safely on your computer, you often want to share a whole album, a wedding, a family reunion, a trip, with people who are not on Facebook or should not have to scroll your profile to find it. Re-uploading to Facebook just re-compresses everything and ties it to the platform again.
A cleaner option is to send the actual files. With ShareIt.onl you can share up to 100 files or 3 GB at once, enough for a whole album, with no sign-up for you or the person receiving them. They get a private link that expires on a schedule you set, plus a QR code for sharing an album in person, at the reunion itself, say.
The photos arrive at the quality you send, not squeezed down by a social feed. If you also post disappearing content, backing up your own Facebook Story helps you capture those moments before they expire.
One note on ownership: these tools are for your content. Using third-party downloaders to grab other people's Facebook photos or albums violates Facebook's Terms of Service and usually copyright law. Back up what is yours, and ask others to send you their originals directly.