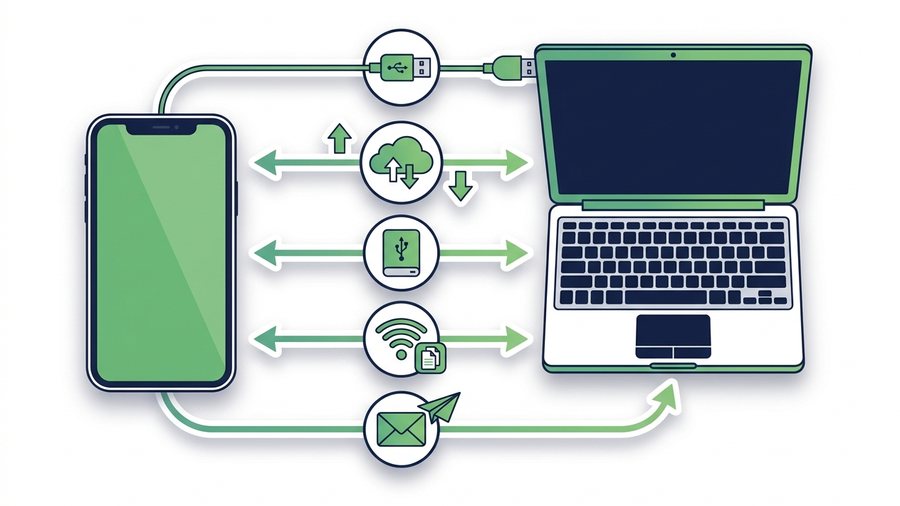
Apple built AirDrop to move files between iPhones and Macs in seconds. The catch is that AirDrop does not exist on Windows, so the trick most iPhone owners rely on simply is not there when they sit down at a PC. That leaves a lot of people staring at a cable, wondering why their photos will not show up.
The good news is that you have five solid options, and none of them require you to be a tech expert. Some use a USB cable, some use the cloud, and one uses nothing but your web browser. Each method has trade-offs around speed, file size, and how much setup it takes.
This guide walks through all five so you can pick the one that fits the moment. If you just need to grab a handful of vacation pictures, a quick browser link will do the job in under a minute. If you are backing up thousands of photos, a cable is worth the extra steps.
Key takeaways
- AirDrop does not exist on Windows because it uses Apple's own Bluetooth and Wi-Fi Direct mix, so you need a different bridge.
- Over USB, your camera roll lives in the DCIM folder, split into subfolders like 100APPLE.
- iCloud for Windows gives ongoing sync but the free tier is only 5 GB, and emailing files caps out near 25 MB.
- A browser link plus QR needs no install or account and moves up to 100 files or 3 GB per batch over Wi-Fi.
Why AirDrop Is Not an Option on Windows
AirDrop only works between Apple devices because it uses Apple's own mix of Bluetooth and Wi-Fi Direct. Windows has no built-in way to receive an AirDrop, and there is no official app that adds it. So the first thing to accept is that you need a different bridge.
That bridge can be a cable, a cloud account, or a shared web link. The rest of this guide covers each path in plain steps.
Quick Comparison of All Five Methods
| Method | Setup needed | Best for | Speed | File size limit |
|---|---|---|---|---|
| USB + File Explorer | Cable only | Photos and videos | Fast | Storage space |
| iCloud for Windows | App + Apple ID | Ongoing sync | Medium | iCloud plan |
| iTunes File Sharing | iTunes app | App documents | Medium | Storage space |
| Browser link + QR | None | A few files fast | Fast on Wi-Fi | 3 GB per batch |
| Email to yourself | None | 1-2 small files | Slow | About 25 MB |
Method 1: USB Cable and File Explorer
This is the most direct way to pull photos and videos off your iPhone, and it needs zero accounts.
Step-by-Step
- Connect your iPhone to the PC with a Lightning or USB-C cable.
- Unlock the phone and tap Trust when the "Trust This Computer?" prompt appears.
- Open File Explorer on Windows and look under This PC for Apple iPhone.
- Open Internal Storage, then the DCIM folder, where your camera roll lives.
- Drag the photos and videos you want into a folder on your PC.
The DCIM folder is split into subfolders with names like 100APPLE, so browse a few if you do not see recent files right away. This method only handles photos and videos, not documents or app data.
Common Snags
If Windows does not show the iPhone at all, the cause is usually a charge-only cable. Try a different cable that supports data. You may also need Apple's device drivers, which come bundled with iTunes or the Apple Devices app.
Method 2: iCloud for Windows
If your photos already sync to iCloud, you can bring them to your PC without a cable.
How to Set It Up
- Download iCloud for Windows from the Microsoft Store.
- Sign in with your Apple ID.
- Check the box for Photos, then click Apply.
- Open File Explorer and find iCloud Photos in the sidebar.
- Click Download photos to pull full-resolution copies to your PC.
This works well for people who want an always-on link between phone and computer. The limit is your iCloud storage plan. The free tier is only 5 GB, which fills up fast, so heavy users often pay for 50 GB or more.
Method 3: iTunes File Sharing
Some apps store documents that never touch your camera roll, like PDFs in a reader app or project files in an editor. iTunes File Sharing reaches those.
Steps
- Install iTunes (or the newer Apple Devices app) on Windows.
- Connect the iPhone with a cable and trust the computer.
- Click the small phone icon, then choose File Sharing in the sidebar.
- Pick an app from the list to see its documents.
- Select files and click Save to to copy them to your PC.
This is niche but useful when a specific app holds files you cannot get any other way.
Method 4: The Browser Link and QR Method
When you just want a few files moved right now, the fastest path skips cables and accounts entirely. You upload from the iPhone in Safari and open the link on your PC.
Why This Works on Any Windows PC
Because it runs in a web browser, it does not care that Windows lacks AirDrop. Any browser on any computer can open a share link, which is exactly why a tool like ShareIt.onl is handy here. You get a link plus a QR code, so the phone-to-PC handoff takes seconds.
Steps
- On your iPhone, open Safari and go to the file-sharing site.
- Tap to upload up to 100 files or 3 GB at once.
- You get a short link and a QR code.
- On your PC, either type the link or scan the QR code with your phone-facing screen.
- Download the files on the PC. The link expires later for privacy.
This is our pick for quick jobs like sending three photos to a work computer. For a deeper walkthrough, see our guide on how to transfer files from phone to PC and the dedicated QR code sharing guide.
Note: Because the transfer runs entirely in the browser, it works even on a locked-down work PC where you cannot install iTunes or iCloud. There is nothing to sign up for and nothing to admin-approve.
Checklist Before You Send
Method 5: Email or Chat to Yourself
For one or two small files, email is the lazy classic. Attach the file, send it to your own address, and open it on the PC. Most email services cap attachments near 25 MB, so this fails for videos. Messaging apps like WhatsApp or Telegram work the same way and often allow larger files.
Picking the Right Method
Match the tool to the task. A quick share of a few photos calls for the browser link. A full backup of your camera roll calls for a USB cable. Ongoing sync across devices calls for iCloud.
| Your goal | Best method |
|---|---|
| Move 3-5 files fast | Browser link + QR |
| Back up thousands of photos | USB + File Explorer |
| Keep phone and PC in sync | iCloud for Windows |
| Grab app documents | iTunes File Sharing |
For photos in particular, iPhone photos to a computer goes deeper on HEIC, the DCIM folders and why imports stall. To move a batch right now without any of that, use phone to computer transfer.