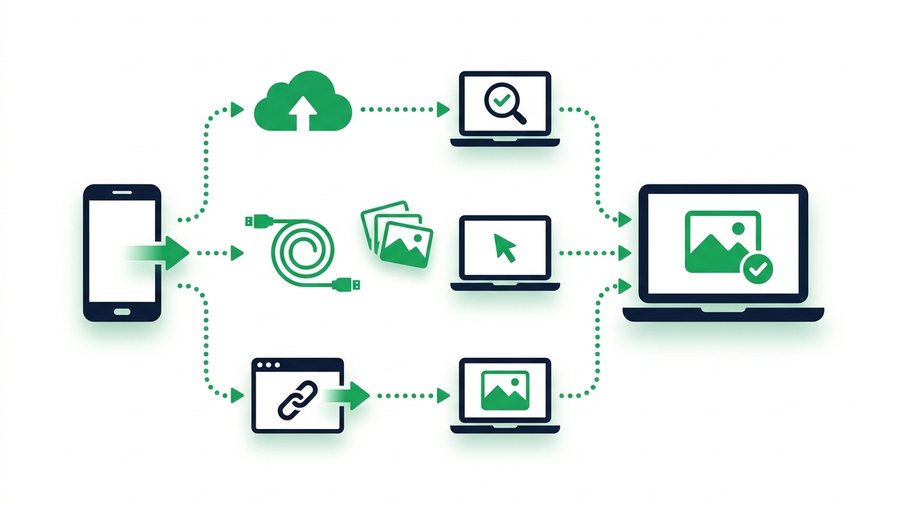
Your phone is probably the best camera you own, which means it is also where your memories pile up. Sooner or later you want those photos on a laptop, whether to edit them, print them, or just clear space on the phone. The move sounds simple, but the method you pick decides how fast it goes and whether your pictures stay sharp.
There are three main ways to do it: a USB cable, cloud auto-backup, and a browser link with a QR code. One is best for a full library, one keeps everything in sync automatically, and one is perfect for grabbing a few shots in a hurry.
This guide covers all three with plain steps, plus the file-format details that quietly affect image quality. Getting HEIC and JPEG right is the difference between a crisp photo and a fuzzy one, so we will cover that too.
Key takeaways
- Three routes: a USB cable (whole library, no batch limit), cloud auto-backup (hands-off sync), or a browser link + QR (a few photos right now).
- A browser link moves up to 100 photos or 3 GB per batch, while a cable copies the exact original with no batch cap.
- Cloud services keep full quality only if you choose Original instead of "storage saver" - Google Photos gives 15 GB free, iCloud just 5 GB.
- Open iPhone HEIC files on old Windows with the free HEIF extension, or shoot JPEG via Settings > Camera > Formats > Most Compatible.
Method 1: The USB Cable
A cable is the workhorse for moving a big batch of photos at full quality. Nothing gets compressed, and you do not need any accounts.
On a Windows Laptop
- Connect the phone with a data cable.
- On the phone, allow access or switch USB mode to File Transfer.
- Open File Explorer and find your phone under This PC.
- Open the DCIM folder and drag photos to a laptop folder.
On a Mac Laptop
- For an iPhone, open the Photos app, click Import, and choose your shots.
- For an Android, use the Android File Transfer app and drag from the DCIM folder.
The cable method preserves the original file exactly, HEIC or JPEG, with no quality loss. It is the fastest way to move thousands of images at once.
Method 2: Cloud Auto-Backup
Cloud backup means your photos land on the laptop without you lifting a finger, because they upload the moment you take them.
Popular Options
- Google Photos: works on any phone, 15 GB free shared with your Google account.
- iCloud Photos: best for iPhone owners, 5 GB free.
- OneDrive or Dropbox: handy if you already use them for work.
How to Use It
- Install the cloud app on your phone and turn on photo backup.
- Wait for photos to upload over Wi-Fi.
- On the laptop, open the service's website or desktop app.
- Download the photos you want at full resolution.
The one thing to watch is the quality setting. Many services offer a compressed "storage saver" mode to save space. If you want the untouched originals, choose the Original or Full quality option in the app's settings before you back up.
Method 3: Browser Link and QR Code
When you need five photos on your laptop right now, a browser transfer is the quickest route. There is no app to install and no account to make.
Why It Keeps Things Simple
You upload from the phone's browser, and a link plus a QR code appear. Because it all runs in a browser, it works the same on Windows, Mac, or Chromebook. That cross-platform reach is what makes ShareIt.onl so handy: a link and a QR code that any laptop can open.
Steps
- On the phone, open your browser and go to the sharing site.
- Upload up to 100 photos or 3 GB total.
- A short link and QR code appear.
- On the laptop, scan the QR code or type the link.
- Download the photos. The link expires later for privacy.
For a step-by-step version aimed at any phone and computer, see how to transfer files from phone to PC. If you swap photos with friends on other brands, our Android and iPhone sharing guide uses the same trick.
Keeping Full Resolution: HEIC and JPEG
The biggest quality mistake is letting a photo get compressed on the way to your laptop. Here is what to know.
Warning: Emailing or messaging photos to yourself almost always re-compresses them, softening detail for good. For keepsakes you plan to print or edit, stick to a cable, "Original" cloud quality, or a direct browser link.
What HEIC Is
Modern iPhones save photos as HEIC, a format that packs high quality into a small file. The downside is that older Windows laptops may not open HEIC without the free HEIF extension from the Microsoft Store. Macs open HEIC natively.
JPEG for Universal Support
If you want a photo that opens anywhere with no add-ons, JPEG is the safe choice. On an iPhone, go to Settings > Camera > Formats and pick Most Compatible to shoot JPEG instead of HEIC.
| Format | Opens everywhere? | Quality per file size | Best for |
|---|---|---|---|
| HEIC | Needs an add-on on old Windows | Excellent | iPhone storage saving |
| JPEG | Yes, universal | Good | Sharing and editing anywhere |
| PNG | Yes | Large files, lossless | Screenshots, graphics |
| RAW | Needs editor software | Highest, huge files | Serious photo editing |
Batching for Big Libraries
If the reason you are moving photos is that you have just bought a phone, the job is a different one - See how to transfer photos to a new phone for the migration paths on each platform.
Moving 2,000 photos at once can choke a browser tab or a slow Wi-Fi link. Batch the job to keep it smooth.
- Move photos in groups of a few hundred if using the cloud.
- For a browser link, send up to 100 files or 3 GB per batch. With typical phone photos, the 100-file count fills up long before the size does.
- For huge libraries, a cable moves everything in one pass with no batch limit.
Method Comparison at a Glance
| Method | Keeps full quality? | Speed | Setup | Best for |
|---|---|---|---|---|
| USB cable | Yes, always | Fastest for bulk | Cable only | Whole library |
| Cloud backup | Yes, if set to original | Depends on Wi-Fi | App + account | Hands-off sync |
| Browser link + QR | Yes | Fast on Wi-Fi | None | A few photos now |
To do this right now, open phone to computer transfer on the laptop and scan the code with your phone. If you are on an iPhone, iPhone photos to a computer covers HEIC and the Trust prompt in detail.