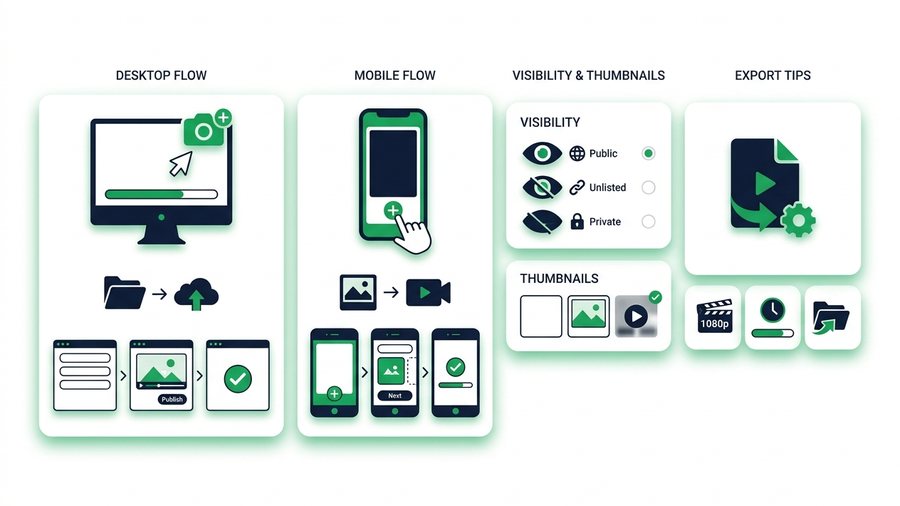
Uploading a video to YouTube is simple once you have done it a few times, but the first upload can feel like a maze of settings. Visibility, thumbnails, tags, playlists, audience selection - The wizard throws a lot at you before your video ever goes live. Miss a setting and your video might publish before it is ready or sit stuck in low quality for an hour.
This guide walks you through the whole process step by step, on both desktop and phone. You will learn where each button lives, which settings actually matter, and how to avoid the two most common rookie mistakes: publishing too early and uploading a file that is smaller than it should be.
We will also cover the export settings that keep your video sharp, why HD can take a while to appear after upload, and the smart move of sending your master file to an editor before you ever touch the upload button.
Key takeaways
- New accounts cap at 15 minutes; verify with a phone number to unlock uploads up to 12 hours or 256 GB.
- Export MP4 (H.264) with AAC audio at 1080p and 8-12 Mbps so YouTube's re-compression stays clean.
- Upload as Unlisted first, since YouTube serves 360p while HD and 4K finish processing, which can take minutes to hours.
- Send your master file to an editor as an expiring link (up to 100 files, 3 GB) before you ever upload.
Before You Upload: Get the File Ready
A great upload starts with a good file. YouTube re-compresses everything you send, so the better your source, the better the final result looks. Export your video with settings YouTube likes and you give it the best shot.
| Setting | Recommended value |
|---|---|
| Container | MP4 |
| Video codec | H.264 |
| Audio codec | AAC-LC, stereo, 48 kHz |
| Resolution | 1920 x 1080 (or 3840 x 2160 for 4K) |
| Frame rate | Match your footage (24, 30, or 60 fps) |
| Bitrate (1080p) | 8-12 Mbps |
Stick close to these numbers and your upload will process cleanly. If you want the full rundown on bitrates and formats for every resolution, our YouTube video size and format guide has the complete tables.
Check Length and Verification
New accounts can upload videos up to 15 minutes long. To post anything longer, you verify your account with a phone number once, which unlocks uploads up to 12 hours or 256 GB, whichever comes first. Do this before a big upload so you are not stuck halfway through.
Uploading on the Web (Desktop)
The desktop uploader gives you the most control, so use it whenever you can. Here is the full flow:
Titles, Descriptions, and Tags
Your title is the single biggest factor in whether someone clicks, so make it clear and specific. The first two lines of your description show under the video, so put the important stuff there. Tags help a little with spelling variations and niche terms, but they are far less important than a strong title and thumbnail. Do not stuff dozens of tags - A handful of relevant ones is plenty.
Tip: Only the first two lines of your description appear before "Show more." Put your key sentence, links, and timestamps up top, not buried at the bottom where few readers scroll.
Thumbnails That Earn Clicks
A custom thumbnail is your video's movie poster. Upload a 1280 x 720 image, keep any text large and readable, and make sure it still looks clear at a tiny size on a phone. A bright, simple thumbnail with one clear subject almost always beats a busy one.
Uploading on Mobile
The YouTube app handles uploads too, which is handy for clips shot on your phone. The steps are shorter but cover the essentials.
| Step | Where to tap |
|---|---|
| Start upload | The + button at the bottom |
| Pick a file | Upload a video |
| Add details | Title, description, visibility screen |
| Choose audience | Kids setting (required) |
| Finish | Upload |
The mobile app is great for quick posts, but it hides some options like custom thumbnails on certain accounts and advanced settings. For an important video, finish the details on desktop even if you started the upload on your phone.
Visibility, Processing, and the HD Wait
Two things trip up new creators after they hit upload: choosing the wrong visibility, and expecting instant high definition.
Choosing Visibility
Visibility controls who can find your video. Pick carefully, because Public means anyone can see it right away.
| Setting | Who can watch |
|---|---|
| Public | Everyone; appears in search and feeds |
| Unlisted | Anyone with the link; not in search |
| Private | Only accounts you invite |
| Scheduled | Goes Public automatically at a set time |
If your video is not final, choose Unlisted or Private while you review it, then switch to Public when it is ready. Scheduling is perfect when you want a video to go live at a specific hour without you being at the keyboard.
Why HD Takes Time
Right after you upload, YouTube processes lower resolutions first, so your video may only offer 360p for a while. Full HD and 4K can take anywhere from several minutes to a couple of hours to finish, depending on length and how busy YouTube's servers are. This is normal. Publish as Unlisted first, wait for the high-resolution versions to appear, then flip to Public so your first viewers see it in full quality.
Send Your Master File to an Editor First
Here is a workflow that saves a lot of headaches: before you upload anything, hand your raw export to whoever needs to review or polish it. An editor adding captions, a client approving the cut, or a teammate checking for errors all need your real file, not a compressed YouTube stream.
The problem is that a finished video is often too big to email. This is where ShareIt.onl helps. Upload up to 100 files or 3 GB, with no sign-up for you or the person receiving it, and send an expiring link or a scannable QR code. Your editor downloads the exact file at full quality, makes their changes, and sends it back the same way. Because the link expires on its own, old drafts do not pile up in anyone's inbox.
Once the final cut is approved, you upload that version to YouTube. For sharing lots of individual clips or a batch of source footage at once, the same direct approach beats juggling links, and you can read more about sharing your videos this way.
Just remember that any music or footage inside your video is subject to copyright, which we explain in the guide to copyright and Content ID. And one more thing worth stating plainly: using a third-party downloader to grab someone else's video to reupload as your own breaks YouTube's Terms of Service and usually copyright law, so only ever upload footage you created or licensed.